Goal
Create a simulation of autonomous flocking agents in the browser using JavaScript Canvas.
Background
What is a boid?
The term (coined by Craig Reynolds in the 1980s) refers to an individual agent in a flocking simulation. Basically, you can think of each “boid” as a bird that moves around its environment according to the behaviors we’ve programmed it with.
Flocking simulations approximate the behaviors of birds, or fish, or whatever other agents might move and flock to one another. By giving each individual agent a simple set of rules to follow, very interesting and beautiful patterns will emerge in the flock. The flock will often appear to be moving as one single conscious organism, when in reality it is an emergent phenomenon caused by many smaller organisms’ following simple rules.
The Starling bird is a great example of the beautiful movements that can arise from this phenomenon:
Classic Boids
In the classic boids examples, boids’ behaviors are calculated by applying three basic rules/forces to each boid:
- Seek – The tendency to move towards the average position of the group (or of the boids within one’s scope of awareness).
- Separation – The tendency to avoid getting too close to any individual boid.
- Align – The tendency to change one’s direction to match the average direction of the group (or of the boids within one’s scope of awareness).
The Code
The HTML/CSS is pretty simple for the actual boids simulation (JavaScript will be doing all the heavy lifting here). Basically what we have is an HTML page that includes a CSS file and a few JS files. The only external library we’ll be using is VictorJS. This is a small library that will help us with the vector math necessary to move our boids around the screen.
Boids HTML
In the <body> of the HTML is a <div> wrapper, and then the <canvas> element, which is where all the magic will happen. The HTML of the final project also contains input elements for controlling the characteristics of the boids, but that’s a little out of the scope of this post.
<!DOCTYPE html>
<html lang="en">
<head>
    <meta charset="utf-8">
    <title>BOIDS!</title>
    <link rel="stylesheet" href="css/style.css">
    <!--[if IE]>
        <script src="http://html5shiv.googlecode.com/svn/trunk/html5.js"></script>
    <![endif]-->
</head>
<body id="home">

    <div id="boids-wrapper">
        <canvas id="boids"></canvas>
    </div>

    <script src="js/victor.min.js"></script>
    <script src="js/boid.js"></script>
    <script src="js/script.js"></script>

</body>
</html>
Boids CSS
The first part of the CSS is just the Meyer Reset. After /* GO! */ is our custom boids CSS, which is very simple. Basically we just want to use the entire browser width and height as the canvas that our boids will be flying around.
/*------------------------------------*\
    RESET
\*------------------------------------*/
/* http://meyerweb.com/eric/tools/css/reset/
    v2.0b1 | 201101
    NOTE:WORK IN PROGRESS
    USE WITH CAUTION AND TEST WITH ABANDON */

html,body,div,span,applet,object,iframe,
h1,h2,h3,h4,h5,h6,p,blockquote,pre,
a,abbr,acronym,address,big,cite,code,
del,dfn,em,img,ins,kbd,q,s,samp,
small,strike,strong,sub,sup,tt,var,
b,u,i,center,
dl,dt,dd,ol,ul,li,
fieldset,form,label,legend,
table,caption,tbody,tfoot,thead,tr,th,td,
article,aside,canvas,details,figcaption,figure,
footer,header,hgroup,menu,nav,section,summary,
time,mark,audio,video{
    margin:0;
    padding:0;
    border:0;
    outline:0;
    font-size:100%;
    font:inherit;
    vertical-align:baseline;
}
/* HTML5 display-role reset for older browsers */
article,aside,details,figcaption,figure,
footer,header,hgroup,menu,nav,section{
    display:block;
}
body{
    line-height:1;
}
ol,ul{
    list-style:none;
}
blockquote,q{
    quotes:none;
}
blockquote:before,blockquote:after,
q:before,q:after{
    content:’’;
    content:none;
}
/* remember to define visible focus styles!
:focus{
    outline:?????;
} */

/* remember to highlight inserts somehow! */
ins{
    text-decoration:none;
}
del{
    text-decoration:line-through;
}

table{
    border-collapse:collapse;
    border-spacing:0;
}

/*------------------------------------*\
    $MAIN
\*------------------------------------*/
/* GO! */
#home {
  height: 100%;
  height: 100vh;
  width: 100%;
  width: 100vw;
  max-height: 100%;
  max-height: 100vh;
  max-width: 100%;
  max-width: 100vw;
  overflow: hidden;
  background-color: #222;
  color: #fafafa;
  color: rgba(255,255,255,.9);
  font-family: arial;
}

#boids-wrapper {
  position: relative;
  display: flex;
  align-items: flex-end;
  height: 100%;
  height: 100vh;
  width: 100%;
  width: 100vw;
  max-height: 100%;
  max-height: 100vh;
  max-width: 100%;
  max-width: 100vw;
  overflow: hidden;
}

#boids {
  position: absolute;
  height: 100%;
  height: 100vh;
  width: 100%;
  width: 100vw;
  max-height: 100%;
  max-height: 100vh;
  max-width: 100%;
  max-width: 100vw;
}
Boids JavaScript
I’ve split the code for this into two files:
- script.js – The main code that will initialize the canvas and the boid attributes and run the animation loop.
- boid.js – The Boid class, which contains all the behavior for individual Boids.
Setup and Initialization
The script starts off by setting up the canvas, getting some browser/device settings, then goes on to declare a few helper functions, and add a limitMagnitude() function to the Victor class, that will allow us to make sure our velocity and force vectors don’t exceed their limits.
Then we move on to initializing the simulation with some default global options. These options can be toggled by the user once the simulation is running.
- walls – This controls whether the edges of the viewport act as walls (boids will avoid hitting them, and bounce off them if they do hit) or simply wrap around to the other side of the screen.
- collisions – If collisions is on, the Boid class will perform collision detection and bounce off one another. If it’s off, boids can occupy the same space on the canvas with no issue.
- mouseSeek – If this is on, boids will seek out the cursor. (Only works on desktop where there is a cursor).
Attributes and Variability
In the classic Boids simulations, all boids exhibit the exact same behavior. But in nature there’s a lot of variability between organisms of the same type, so I’ve added a few attributes and some variability into my boids. Most of the attributes are numeric, and different numbers will cause boids to behave differently. I’ve also included a color attribute, which will affect their behavior and how they display. Below is a list of the attributes that will vary between each boid instance:
- Radius – Determines the size of the boid. This is dependent on both the size of the viewport and the radiusCoefficient generated for the boid.
- Introversion – Determines how strong the boid’s tendency to separate from its peers will be. The more introverted the boid, the farther from the flock it will prefer to be. Affected by the boid’s introversionCoefficient.
- Quickness – Determines how fast the boid’s maximum speed will be. Affected by the boid’s quicknessCoefficient.
- Racism – Determines the degree to which a boid will avoid boid’s of another color. At 0, boids will act the same towards boids of all colors, at 10, they will have an enhanced desire to avoid boids of different colors. Affected by the boid’s racismCoefficient.
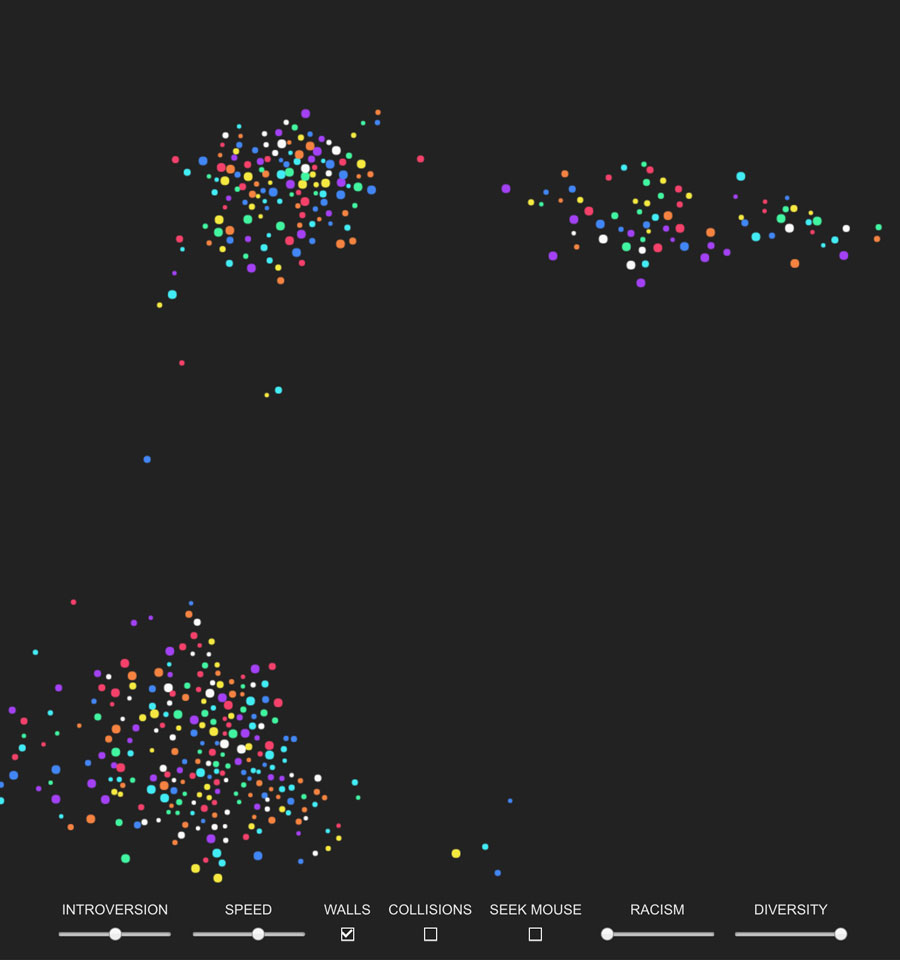
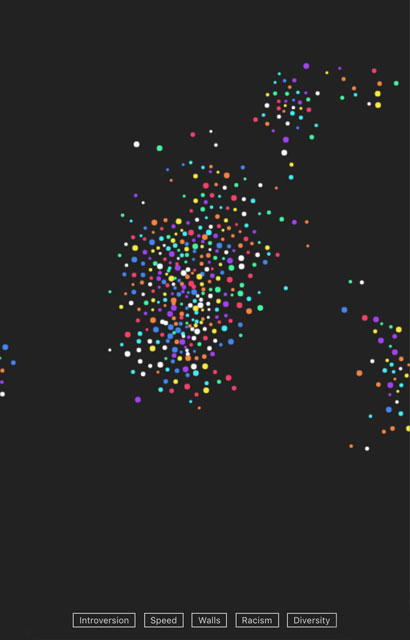
- Color – When initialized, boids are randomly assigned colors. There is a Diversity option slider that can be used to change the diversity of the boids’ colors. If it is cranked all the way up, there will be many different colors of boids, all the way down, and all boids will be the same color. Playing with this slider and the Racism slider can create some interesting effects.
Many of the attributes above will be partially determined by coefficients that are generated before the simulation starts. These coefficients are generated via a method that simulates a normal (gaussian) distribution. This means that for each of these attributes, most of the boids will have roughly the same value, but there will be some outliers. IE some very fast boids, and some very slow, or some will be very racist, while some wont care about color very much at all.
You can visit the demo below and play with the options and attributes to affect the boids’ behavior: